Friday, February 8, 2013

Valentines Week - Free Printable

Valentines Printable

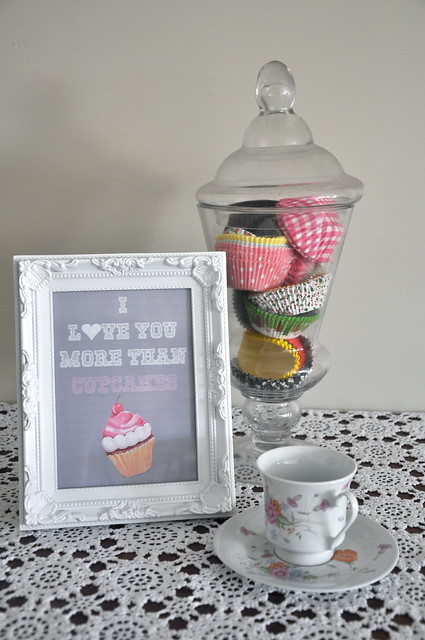
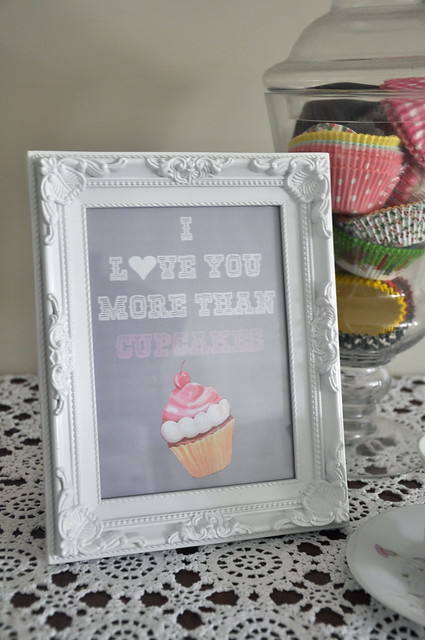
Today I have a free valentines printable for you all.  I have been having loads of fun making printables and playing with photoshop (which I actually got for valentines day 2 years ago but have yet to properly learn how to use).  This printable is a bit light and fun for valentines day.

Valentines Printable

Now I love cupcakes! They are one of my most favourite things in the world.  So for me to say I love you more than cupcakes is a pretty big thing.  I am sure there are few others out there in blog world who could say the same thing.  This printable is 5 x 7 and would look perfect in a cute little frame.  Or you could print it out and make it into a card for your loved on for valentines day.  The choice is all yours!  I will be adding mine into our cluster wall I think.  It seems like the perfect printable to have in the kitchen!

To download your copy of this printable simply click here.

Thursday, February 7, 2013

Valentines Week - Love Shirt

Love Tshirt

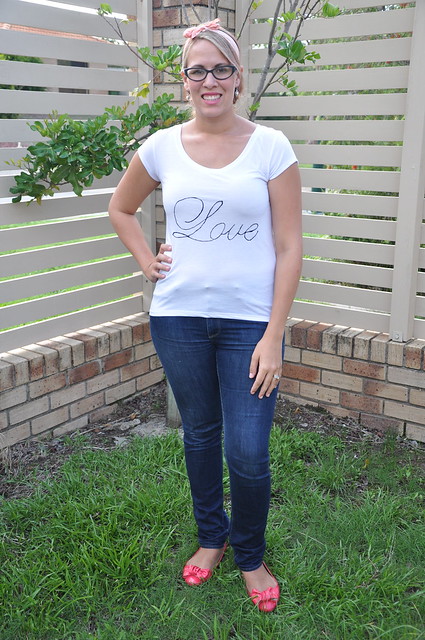
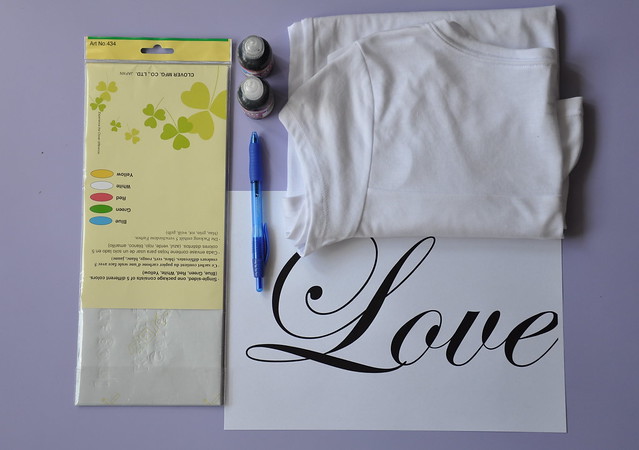
This shirt was my first idea when I decided I was going to do Valentine’s Week.  This diy could be adapted to any occasion and doesn’t just have to be for Valentine’s Day.  Simply change the phrase you are putting on the shirt.  Or even use a picture.  So do you want to make yourself a love shirt?  Then this is what you will need.

Love Tshirt

T-shirt
Fabric Paint
Tracing Paper – I used clover brand from the Spotlight quilting department.
Pen
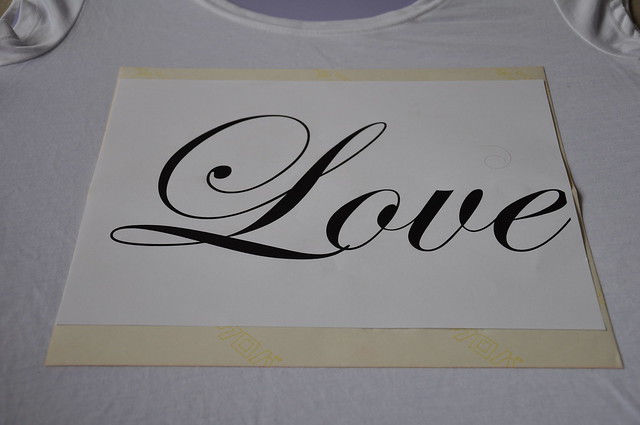
Stencil – print whatever phrase you would like on your shirt on a A4 piece of paper.  I used the font Edwardian Script which comes standard with word for Mac.
Cardboard (not pictured)

Love Tshirt

Place tracing paper colour side down on your tshirt and your stencil on top.  Using your pen (I like to use it without the point popped out) firmly trace over your stencil.  When you lift the stencil and tracing paper you will  be left with a faint outline of your word.

Love Tshirt

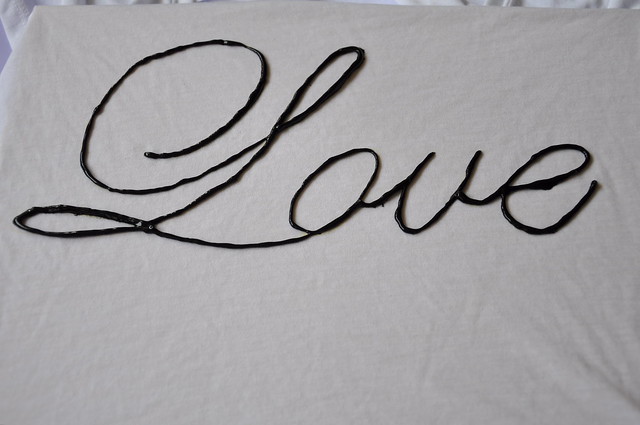
Slide your cardboard into your shirt so it is behind your word.  This will stop the paint bleeding through.  Now using your fabric paint simply trace over this outline.  Take it slowly and go section by section.  This will help you to keep your hand steady and your lines even.  Refer to your fabric paint regarding drying time.  Mine said to dry flat for 24 hours.

Love Tshirt

Now your ready to rock your new t-shirt!  It’s as simple as that.  This would be a really good way to revamp old tshirts that you don’t wear anymore as well.  If you are confident with your painting abilities you could do a whole picture on your shirt.  The options are only as limited as your imagination!

Wednesday, February 6, 2013

Valentines Week - Cross Stitch Necklace


After my recent foray into cross stitching I have been on the lookout for more cross stitch projects to do.  When I spotted these buttons in Spotlight a few weeks ago I knew they would be the perfect alternative to cross stitch pendants which are also in Spotlight but much more expensive.

Cross Stitch Heart Necklace

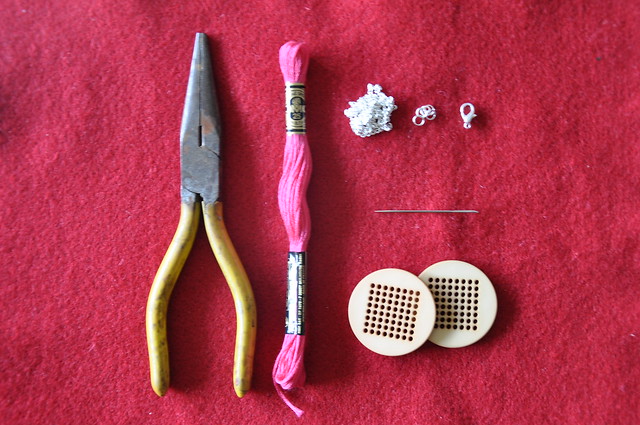
These are so simple to make!  All you need is a cross stich pendant, some embroidery thread, a needle, a small pair of pliers, a necklace chain, necklace clasp and a couple of jump rings. 

Cross Stitch Heart Necklace

Decide what pattern you would like to cross stich onto your pendant.  I chose a simple heart for Valentine’s Day but you could do anything you like.  A quick google search will come up with heaps of patterns that you can use.  Once you have chosen a pattern cross stitch this onto your pendant.  As the holes in my pendant are quite large I used 6 strands of thread and a yarn needle but you will need to choose materials based on your pendant size.

Cross Stitch Heart Necklace

Using your small pliers attach a jump ring to your pendant.  Attach another jump ring to one end of your necklace chain and a clasp to the opposite end of the chain.  Thread your necklace chain through the pendant jump ring and ta-da you have a finished necklace.  Quick, easy and super cute!  Another option would be to glue a brooch clasp onto the back of your pendant and wear it as a brooch instead.  I of course am greedy so decided I needed one of each!

Cross Stitch Heart Necklace

If you are having trouble finding cross stitch pendants in your local craft stores I did a quick search on etsy and quite a few came up in both Australia and overseas.  But if you can find these buttons at your local Spotlight snap them up because they were only like $1 each.  You will just need a drill to make a quick hole in the top for your jump ring. So go, get crafty and if you make a necklace or brooch be sure to let me know in the comments so I can check it out.

Tuesday, February 5, 2013

52 Weeks of Happy (5/52)

Oh my how this year is flying by! Oh and look at that I made a rhyme.  My talents never end ;-)  So here is what has been making me happy this week.


1 - Happiness is finally finishing this gorgeous outfit that I have had on my mind since before Christmas.  If you missed it check it out here.

2 - Happiness is the simple pleasure of finding this adorable vintage zippers at the local op shop.

3 - Happiness is celebrating the beginning of love month with Imogen's adorable little heart themed outfit.

4 - Happiness is signing up to do my first ever 5km run.  Well it's happiness mixed with a little bit of nervousness.  I have never run a race in my life, well since leaving school, so this should be interesting.

5 - Happiness is dressing my daughter up and taking photos to stash away for her 21st.  These possibly will not make her happy in the future but she is just so stinking adorable in my glasses and those ear muffs. How could I resist!

6 - Happiness is taking my cake decorating class that Corey bought me for my Christmas present.  This has got to be the best Christmas present ever!!! It was a full day lesson that taught us how to properly level, ganache and fondant cover a round cake.  We also learnt how to do flowers with sugar paste and how to stencil with royal icing.  It was so much fun and I am so excited about how what I can do now with these skills.

So my gorgeous readers, tell me, what is making you happy this week?

Valentines Week - Heart Sandwich Cookies


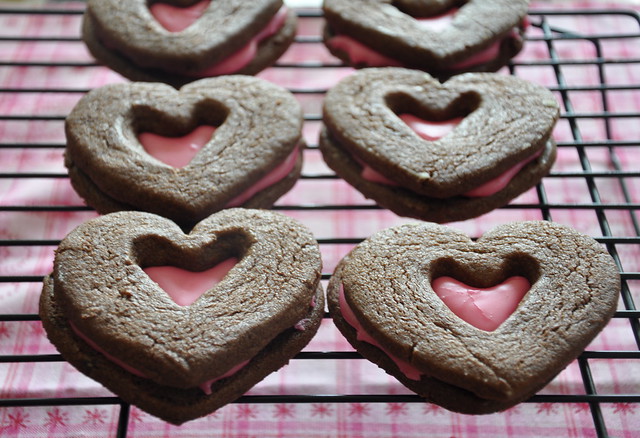
Cookies are so much fun to make but for some reason I don’t seem to make them very often.  I think this is because my go to baking thing is always cupcakes.  Whenever I feel like baking I instantly think cupcakes or cake but never cookies.  So when I was deciding on things to make for Valentine’s Week I thought I am definitely doing some cookies.

Heart Sandwich Cookies

I love the look of sandwich cookies.  They are so easy to make and look so cute.  They are a little more time consuming with the assembly but I think the end product is well worth it.  I think these would make a great valentines present or even an anniversary present.  Simply pop a few cookies into a cellophane bag and tie with some pink ribbon.  Quick and easy!

Heart Sandwich Cookies

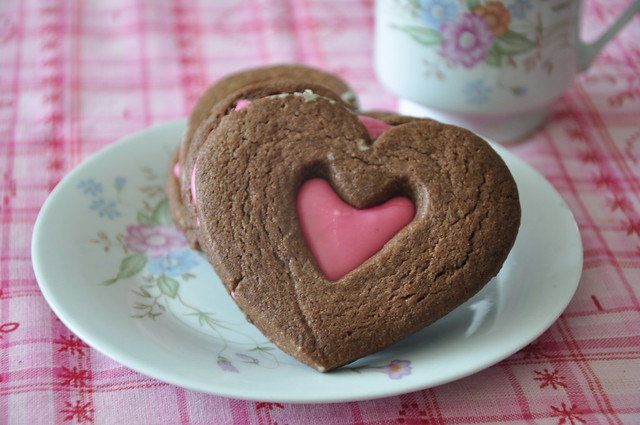
For these cookies I used the chocolate rolled cookie recipe from The Decorated Cookie which you can find here.  Making them into these cut out sandwiches is super easy.  First cut your hearts out.  With half the hearts use a smaller cookie cutter to cut another heart out of the centre of the cookie.  Once the cookies are baked and cooled ice your full heart cookies and top each with a cut out cookie.  Simple as that!  If you want to take the cookies a step further you could also ice the top cookies or dust them with icing sugar.  The options are endless!

Monday, February 4, 2013

Valentines Week - Love Heart Leggings


I am so in love with these leggings!  This diy was inspired by some adorable leggings I saw online which were unfortunately sold out in my size.  They seem to be sold out completely now as I can’t find a link on their site to share with you.  Anyway, being the crafty girl that I am I decided if I couldn’t buy a pair I would need to make myself a pair.

Heart Leggings Tutorial

I have been wanting to try freezer paper stencilling for ages so this seemed like the perfect opportunity.  For those in Australia freezer paper is not readily available in the supermarket as it is in America.  I bought mine at the cutting counter of my local Spotlight for $1.50 a metre.  For this project you will only need a tiny amount.

Heart Leggings Tutorial

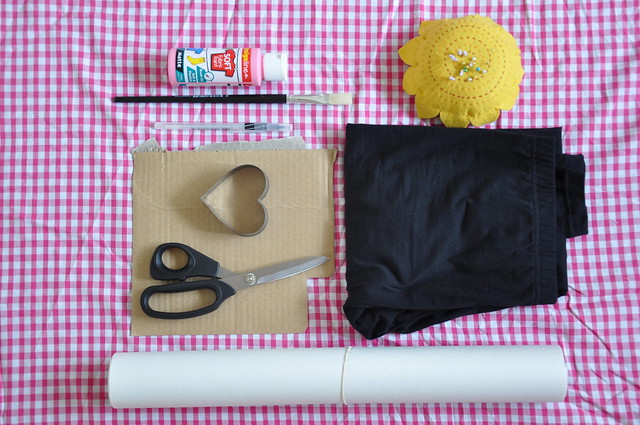
Okay so firstly you are going to need to gather your materials.  For this project you will need a pair of leggings, freezer paper, pins, pencil, heart cookie cutter (or stencil), fabric paint, paint brush and cardboard.
Heart Leggings Tutorial

Firstly you will need to try on your leggings and mark where you would like your hearts to be placed.  I found the easiest way to do this was standing in front of a mirror.  I placed a pin at the top of my kneecap and another at the bottom of my knee.  Then stand up straight and make sure they are even.  Carefully take your leggings off so you don’t pin yourself.

Heart Leggings Tutorial

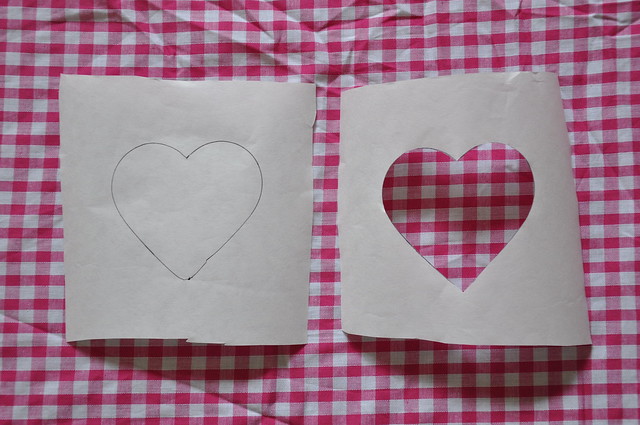
Cut two small squares of freezer paper.  Make sure your squares are big enough so there is a few centimetres of space around the outside of your heart cookie cutter/stencil.  Use a pen to trace around your stencil on the matte side of the freezer paper and then follow this line to cut out your hearts.

Heart Leggings Tutorial

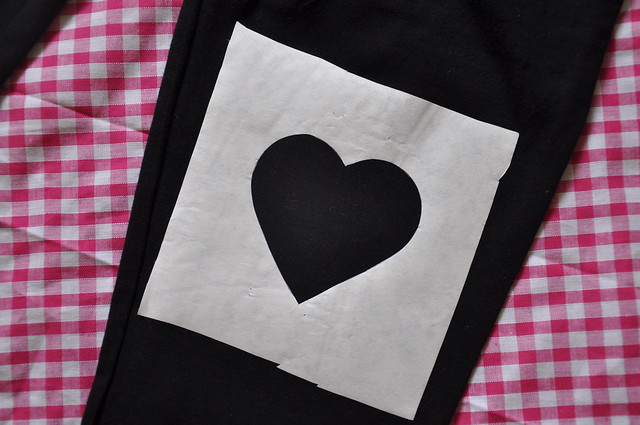
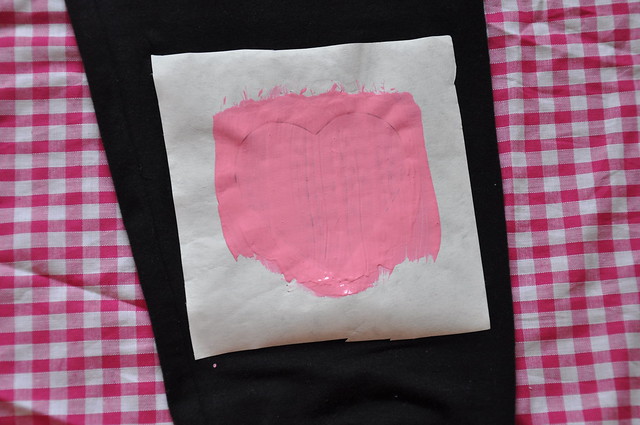
Using your pins as a guide place the freezer paper shiny side down onto your leggings and pin in place.  Try your leggings on again to ensure the hearts are straight and line up.  Again be careful putting on and taking off your leggings so you don’t stab yourself with a pin.  Trust me it hurts!  Once you are happy with the placement use a hot iron to the freezer paper in place.

Heart Leggings Tutorial

Cut your cardboard down to size so it fits inside your leggings.  Place the cardboard behind your stencil to ensure the paint doesn’t bleed through.  Now you are ready to paint your fabric paint on.  I used a light colour on dark leggings so I had to do a few coats.  Do as many coats as you need to achieve the colour you like.  Follow the instructions on your fabric paint for drying time.  Mine had to sit for 24 hours to dry.

Heart Leggings Tutorial

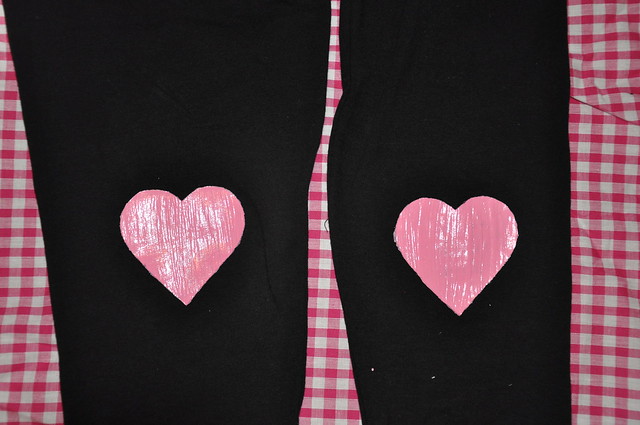
Once the paint is dry carefully peel away the freezer paper from your leggings.  You should be left with a nice sharp image of your heart.  Ta da! Your done. 

IHeart Leggings Tutorial

Now pop on your new leggings and wear them this Valentine’s Day.  They give a whole new meaning to wearing your heart on your sleeve (or legs!)

Friday, February 1, 2013

Valentine's Week

Why hello there February!  I love February.  It's the month of love.  One of my favourite months of the year.  So to celebrate I am doing a week of Valentine's Day themed DIY's.  Starting on Monday I will be sharing some tutorials and recipes that you can use to make a Valentine's gift for your loved one, yourself or your family & friends.


So stay tuned for the first tutorial on Monday morning!  I hope you guys like them as much as I have liked making them all.