Showing posts with label nursery. Show all posts

Thursday, October 4, 2012

Nursery Tour

As promised I finally have some photos of Squishy's finished nursery to share with you all.  I am pretty much in love with this room.  I tend to go in there and just hang out randomly during the day.  The room was based on the fabrics I bought to make Squishy's quilt.  Once I had those everything else was tailored to match.  But that's enough chat, onto the photos....

Nursery Tour Nursery Tour Nursery Tour Nursery Tour Nursery Tour Nursery Tour Nursery Tour Nursery Tour Nursery Tour Nursery Tour Nursery Tour Nursery Tour Nursery Tour Nursery Tour

Once we choose a name (we have narrowed it down to 2 choices) I would like to put her name along the wall above her cot.  I am debating whether to do plain white letters or paint them or cover them in scrapbook paper.  Any suggestions would be greatly appreciated.

And because I always look at room tours and think "oh I want one of those" here is a bit of a breakdown of the items I made (and tutorials used) and the items I bought.

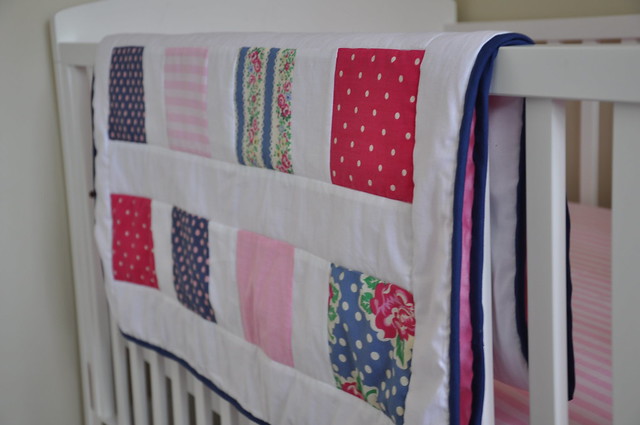
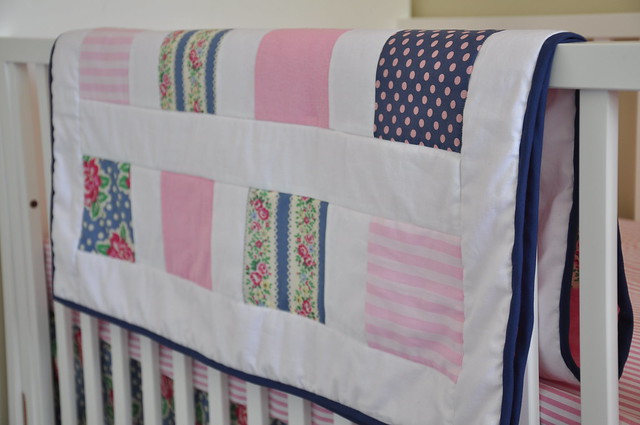
Quilt - made by me (using this tutorial)
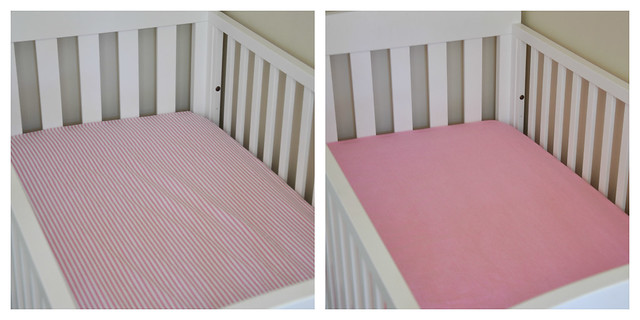
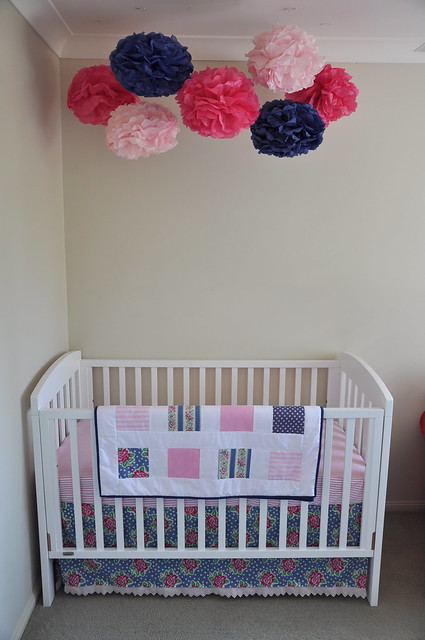
Cot Sheets - made by me (using this tutorial)
Cot Skirt - made by me (no tutorial used)
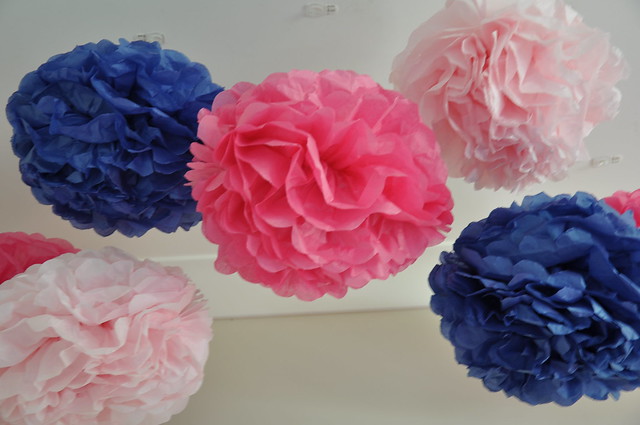
Tissue Paper Pom Poms - made by me (various tutorials for these can be found online)
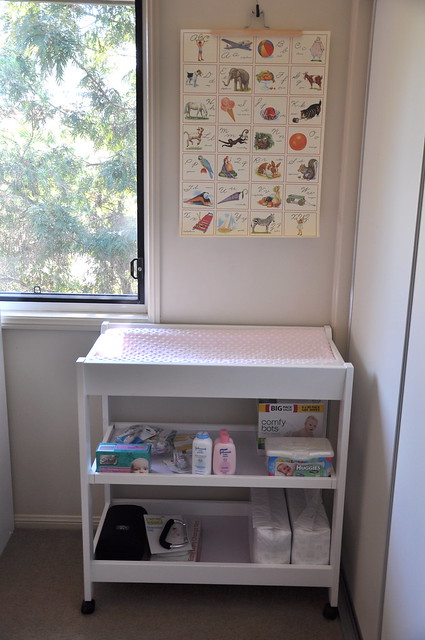
Cot & Change Table - Boori Urbane from Baby Bunting
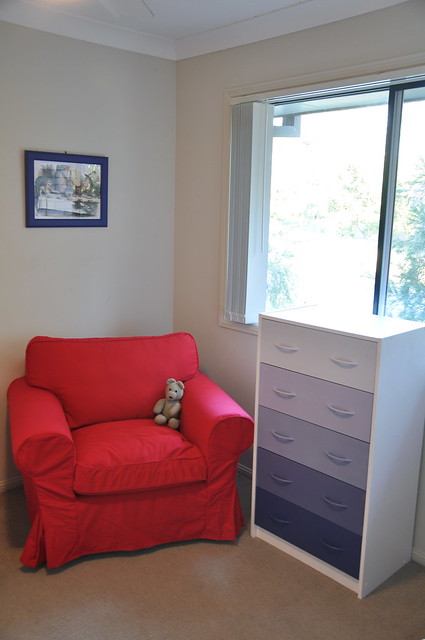
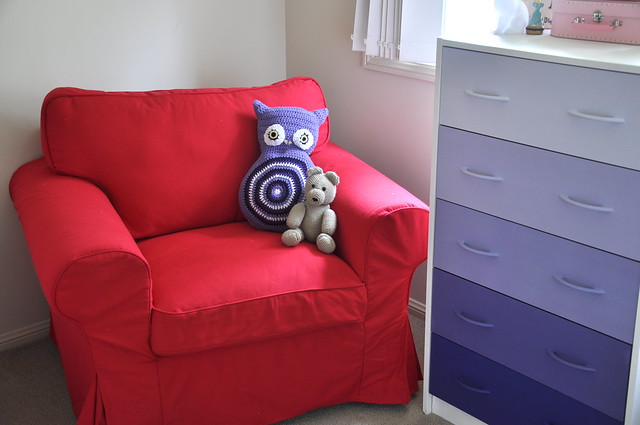
Armchair - Ikea
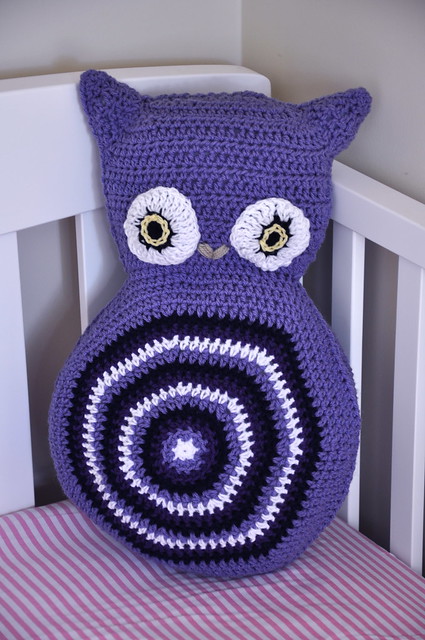
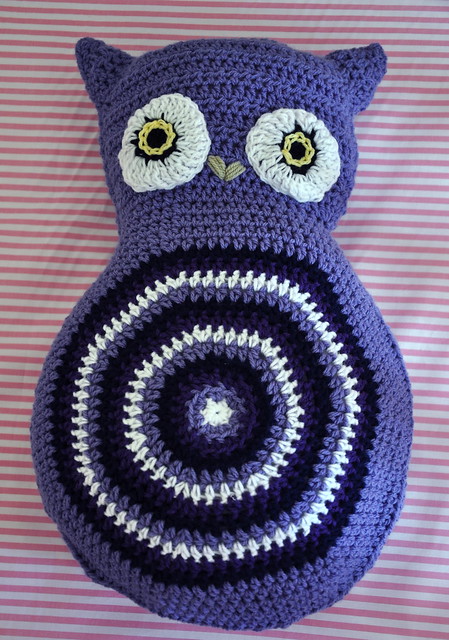
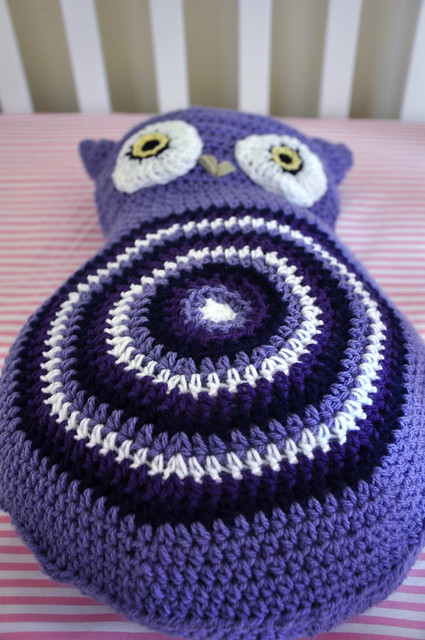
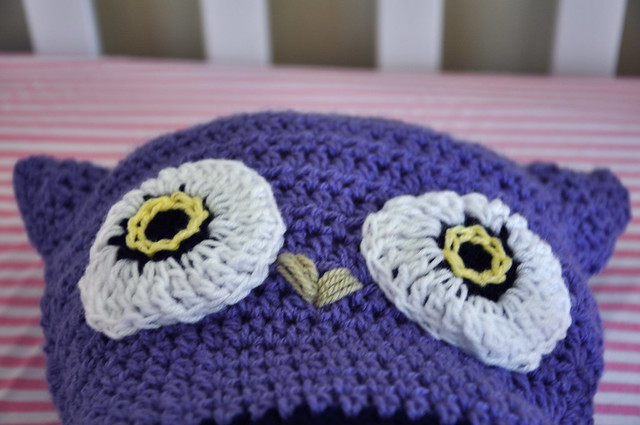
Owl Cushion - made by me (details here)
Teddy Bear - made by me (details here)
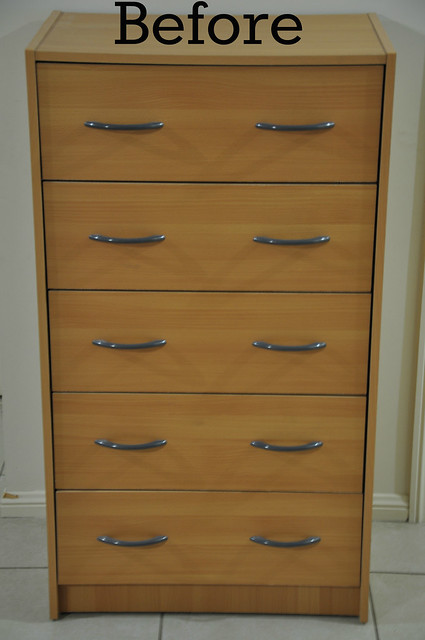
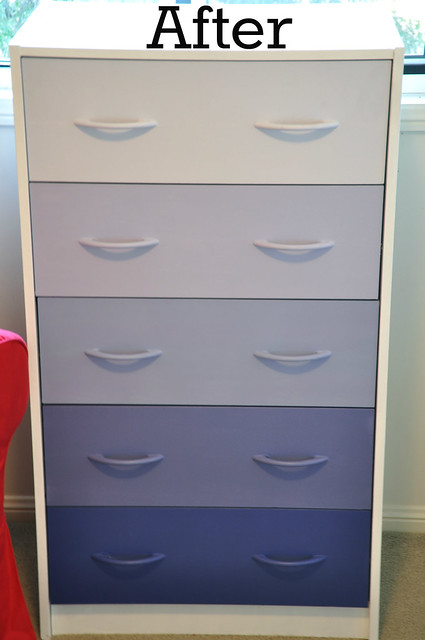
Dresser - Corey's old ones revamped (details here)
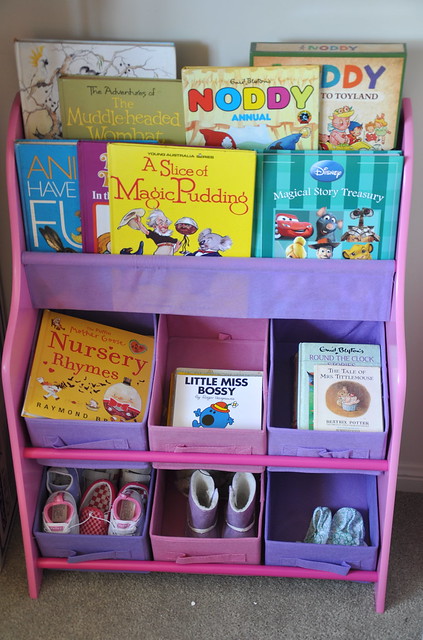
Noddy Book Box - from a little hippy shop in St Kilda (not sure of the name)
Rabbit Night Light - Lark Made
Pink Suitcases - That's 2 Cute
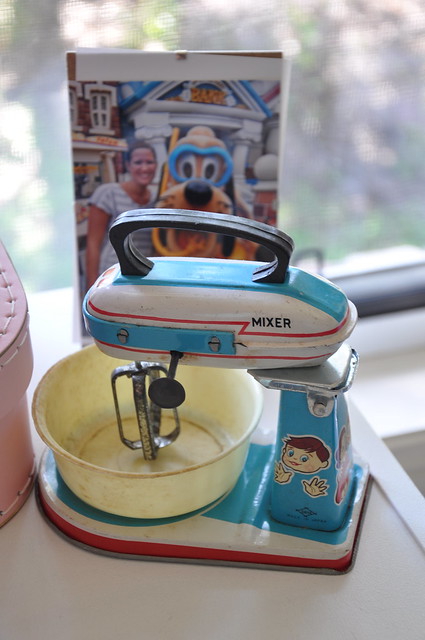
Mixer Toy - vintage - was my mum's when she was a kid
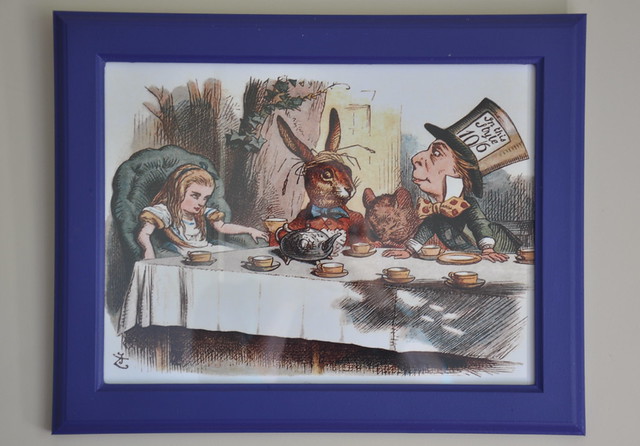
Alice In Wonderland Print - Shannon Markets
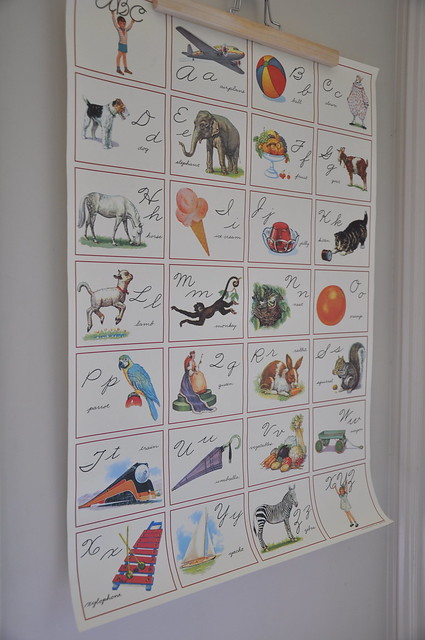
ABC Print - is actually wrapping paper bought from a little shop on Brunswick Street
Bookshelf - Kmart

Wednesday, September 26, 2012

Owl Cushion

Crochet Owl Cushion

I have finally finished the last project I wanted to get done for Little Miss Squishy's nursery.  I wanted to make a cushion for the nursing chair that we have in her room.  Originally I was going to make a crochet square cushion and embroider a monogram onto it once we chose her name.  However, when I saw this pattern I just couldn't resist making this adorable owl.

Crochet Owl Cushion

Pattern: Crochet Owl Cushion by Zoom Yummy
Hook: 4mm
Yarn: Moda Vera Marvel 8 ply
Start/End Date: 11/9/12 - 25/9/12

Crochet Owl Cushion 

This cushion was actually really fast to make even though it actually took me two weeks.  I finished the front really quickly but then the poor thing sat neglected for over a week.  I finally picked the project back up yesterday and managed to finish the whole project in just a few hours.

Crochet Owl Cushion 

So that is the last thing that I wanted to make for the nursery.  Now that is complete we are totally ready for Squishy to make her arrival.  And that means that I can share some nursery photos with you all.  Yay!!! Stay tuned for those soon.

Wednesday, August 22, 2012

Holy Sheet!

Oh wow! Is it the baby brain making my blog titles go down hill? Let's hope so. Expect better title in approximately 7 weeks.

Nursery Progress

This weeks project for Squishy's room was to make her some sheets.  The room is slowly coming together and I have managed to get my to do list down to about 3 items which is exciting.  Especially considering we are so close to meeting her and the weeks just keep slipping by.

cot sheets
The sheets were loosely based on this tutorial by Dana Made It.  I read over it and then realised my measurements might be different.  To get my measurements I measured the length and width of the mattress then added the depth of the mattress plus 3 inches for a hem and to fit under the mattress.  They were actually really easy to make and nearly all the fabric was left over from the quilt.  I actually made 3 sheets for the cot but 2 of them were different pink stripes and looked basically identical in photos.

bassinet sheets
These were so easy I decided to whip up a few for the bassinet as well.  Considering the baby shop is selling bassinet sheets for $18 each this is a quick and easy way to save money.  I was a bit lazy with the bassinet sheets and simply lay the mattress on top of my fabric and cut around it.  They worked out perfectly though!

Making your own sheets is so quick and easy and for cribs and bassinets that don't need that much fabric they work out quite cheap compared to buying sheets.  And if your a bit anal about colours matching like I am you can make sure your sheets are the perfect match for the rest of your room.  When I have my last few items crossed off the list I will get a few more photos of the nursery to share with you.  Hopefully that will be within the next few weeks.

Wednesday, August 15, 2012

A Quilt....Finally!

That's right folks I have finally finished the quilt for Squishy's room.  I actually finished it about 1.5 ago but it took me till last weekend to get photos and then till today to post about it.  I am so so so happy with how this quilt turned out.  It is a massive improvement from the first quilt I ever made.

Squishy's Quilt

When we first found out we were having a girl I went to Spotlight and chose a bunch of fabrics as the starting point for decorating the nursery.  The fabrics became this quilt and will also become some sheets and a cot skirt hopefully in the next couple of weeks.

Squishy's Quilt

I learnt a few things while making this quilt:-
  • If your doing a pieced back you should probably line it up with one of the stripes on the front to avoid a sewn line in the middle of your stripe.
  • I need to use more pins to hold my layers together while quilting. I don't think I used enough so I have a few puckers in the layers.
  • When your not good at sewing straight lines sewing a quilt that emphasizes them can be frustrating.
  • Invisible hand stitching for quilt binding is not as hard as I imagined.
Squishy's Quilt

Regardless of it's imperfections I am really happy with how this quilt has turned out. I have worked my way up from a pram sized quilt to a cot quilt and who knows next time it might be a single bed quilt.  I am getting a bit more confident with the idea of quilting so I think I will definitely be making some more.  Maybe just not for a little while!

Tuesday, August 7, 2012

Ombre Dresser Makeover

Squishy's New Dresser

I have had the below picture saved in my pinterest for quite some time now and was really hoping that I would get a chance to make something similar for Squishy.  We have been debating for ages what to do for her clothes but finally last week got it sorted out.


Corey had two dressers both full of clothes but most of them he didn't wear.  So last week when he was off work he spent a day sorting them out and the empty dresser got moved into Squishy's room.  That night I came home and was staring at it and thought "you know what will make this look even better..."  Then because I have the bestest husband in the whole wide world we took a trip to Bunnings and picked up some paint.

paint choices

The pictures all make the colours look blue but they are actually a range of purples.  They are all Taubmans paints and if you are interested in the names just let me know and I will email them to you.

dresser before

Because the dresser was wood laminate we had to put an undercoat on it first to help the paint grip.  If you did this with a natural untreated wood dresser it would be quicker because you could skip that first coat.  We were going to buy new handles but then decided just to paint over the existing ones so they would blend in with each drawer.

dresser after

The very next day Corey (aka the bestest husband in the world) spent an entire day painting the drawers.  By the time I got home from work they were all done and hanging out in our garage to dry.  The next morning little Squishy had a brand new set of drawers.  The original plan was to put her drawers inside her cupboard to save space but these just looked so good that I rearranged the room so that they could be kept out.  The nursery is now slowly starting to look like a real room and I can't wait for it to be finished.  Hopefully it will be done in the next few weeks so I can share some pictures.