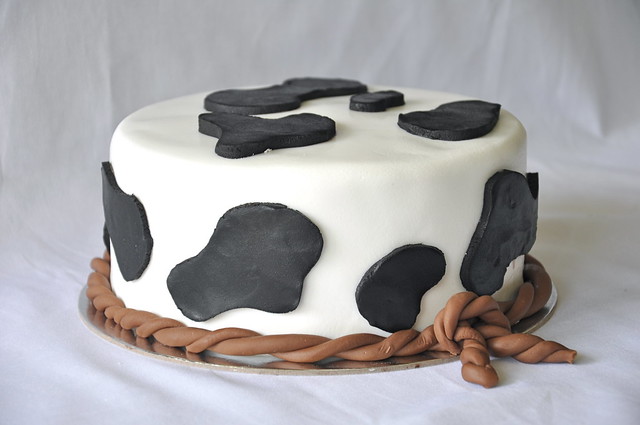
Brittany's cow print birthday cake - my most recent cake decorating venture.
1 - Read, Read, Read!!!
Before I started using fondant at all I bought myself the Planet Cake book and I read it from cover to cover, twice. I had never used fondant before so I wanted to make sure I knew exactly what I was getting myself into before I started. There are a million cake decorating books out there so don't think I am trying to get you to buy this one. It just happened to be the one I found when I was wanting to learn. I do like it's format because it breaks down all the steps of cake decorating and goes into all of them in detail. I am the sort of person who finds the more information the better so reading up before starting really helped me to get an idea of what I was about to do.
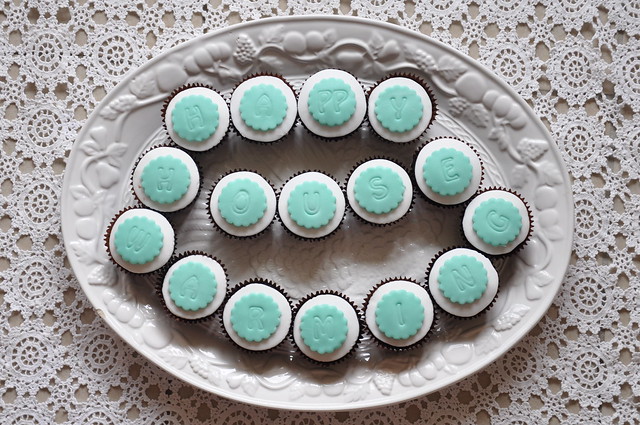
Housewarming Cupcakes - cupcakes are a great place to start before attempting to decorate a full sized cake.
2 - Start Small
The very first thing I did with fondant was cupcakes. Cupcakes are the easiest place to start as they are small so you don't need to work with as large amounts of fondant at a time. To cover cupcakes you simply need a round cookie cutter the same size as your cupcakes. This allows you to cut rounds of fondant which will fit your cupcakes perfectly. Then you are able to decorate on top of these rounds. For my first cupcakes I simply cut fondant with heart shaped cutters and layered on top. The image above shows some cupcakes I made for a housewarming with some fondant, round cutters, scalloped cutters and alphabet stamps. This is a very basic design but still effective and a good place to start.
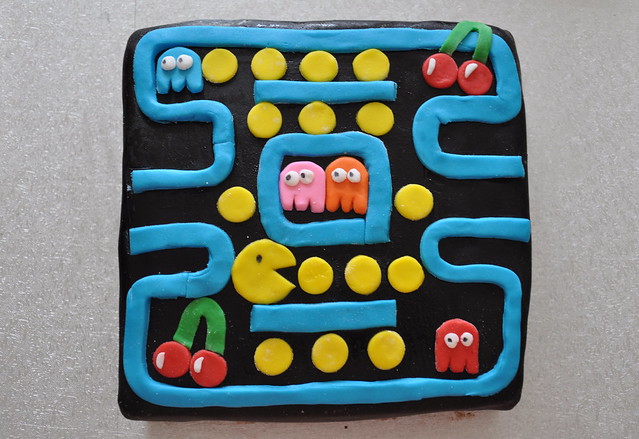
Corey's birthday cake from last year. My first time covering a square cake which I still need some practice at.
3 - Take Your Time
The biggest thing I learnt from the Planet Cake book is that cake decorating takes time. You need to ensure you allow yourself this time. If you try to rush from baking to decorating your cake won't have cooled enough and things will go awry. This was also reiterated in my cake decorating class. For fondant decorated cakes I always allow 3 days. I bake the cake and make ganache on the first day. On the second day I will level, layer and ganache my cakes. Once the cake is ganached I will let it sit in the fridge overnight and on the last day I will decorate. If I am doing a non fondant decorated cake I allow 2 days. The first day for baking and the second day for decorating. This ensures that the cake is completely cooled before you do any decorating.
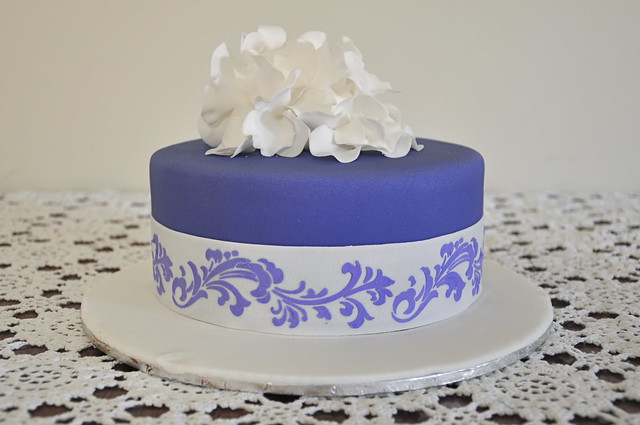
The cake I made for in my decorating class. This was my first time stenciling and using sugar paste.
4 - Expand Your Knowledge
Once you have done a couple of cakes yourself it is time to expand your knowledge further. For me this involved taking a cake decorating class which is something I would highly recommend. I found that talking to a professional and having the opportunity to get assistance during the decorating process really helped me to learn more about what I was doing wrong. Since doing my class I am a lot more confident with my cake decorating. I came away with so many notes from the class and a lot of them were such simple things that made you think "why didn't I think of that!" That is were the real value of doing a class comes in. The little tricks and tips you learn from a real person that you just can't read in a book.
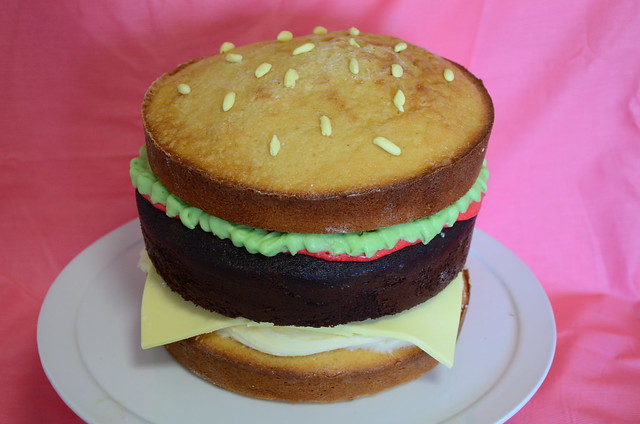
This is another super easy simple design with fondant used for the cheese and sesame seeds on the burger.
5 - Don't Be Scared To Try Something New
The biggest part of cake decorating which I am just pushing myself to do now is to try something new. Don't be afraid to try a more intricate design or to do something new (like modelling or make sugarpaste flowers). There is always something different to try and you should never be afraid to give it a go. I made some basic flowers in my cake class and next I would like to try making some bigger individual flowers with sugarpaste. I am thinking a simple round tiered cake with one large flower would look amazing. All I need to do is find an occasion to make it for.
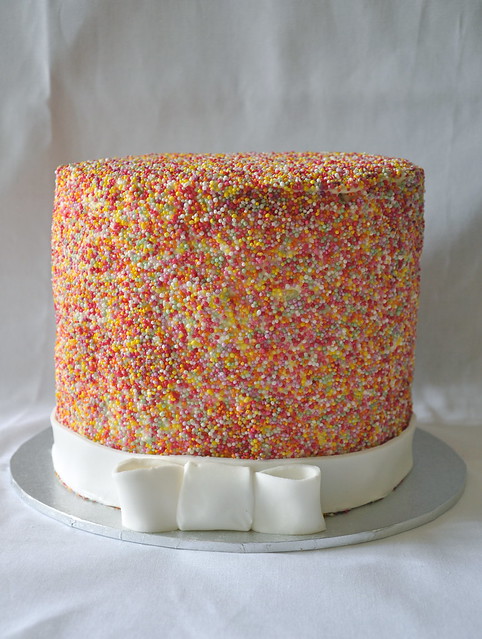
Now quickly before I go a couple of people asked me about how I covered Tailah's birthday cake in sprinkles. Now there is a tutorial here on how you can roll the cake in sprinkles but given that I had spent 2 days on this cake already I was not prepared to risk ruining it by picking it up and laying it on it's side. What I did was to put my cake into a large container (this is to catch the sprinkles). I then tilted the cake to the side (I had "glued" it to the cake board with icing so I knew it wasn't going to fall off) and sprinkled the sprinkles on the side. You have to do it slowly so that the sprinkles actually catch to the icing. I then (with very clean hands) grabbed handfuls of sprinkles and patted them onto the spots that were a little bare. It's not the fastest method but it saved me the anxiety of thinking I might ruin the entire cake.
So there you have it, my top tips for anyone wanting to try out fondant. Now remember I am not a professional by any means. I am mostly self taught (with one class) and have gotten most of my knowledge from books and the internet. So if I can jump into this and just give it a go then you can too. If you decided to try out fondant let me know so I can check out what you have made. Happy decorating!


Kat, what an awesome post! Definitely bookmarking this! xxx
ReplyDeleteThanks for such great tips. All the cakes you make look amazing and its great to know you are pretty much self-taught!
ReplyDeleteWhat an excellent post Kat, you are one multi-talented lady. And the fact that you're still managing to bake and sew (to such high standards) with a baby to look after is truly inspiring!
ReplyDeletethis is a great post, I love your tips and cakes. I want to eat that pacman one right now haha
ReplyDeleteI have pinned this on pinterest, I hope you don't mind xx